
Voronoi: Touchable Diagrams in iOS Simulator
Posted by Jeffrey
I’ve put together another OCaml app that you can run on the iOS Simulator. It lets you make colorful pictures based on Voronoi diagrams. Although Voronoi diagrams are computationally interesting, they also just look very cool.
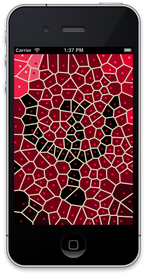

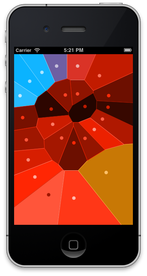
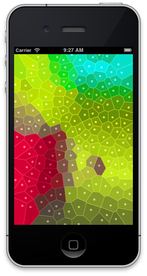
A Voronoi diagram is based on a set of dots on the screen. Each dot “claims” the area closest to it, and gets to say what color it should be. As you move the dots around, the shapes of the claimed areas adapt to the different layout, and the colors change. It’s hard to describe, but very enjoyable to play with.
If you don’t want to build it yourself, a prebuilt binary for Voronoi is available from Psellos. See below for how to try it out in the iOS Simulator (it’s extremely easy). Otherwise you can get the sources from Psellos, compile using Xcode tools, and run the app in the iOS Simulator. This is also pretty easy. All you need for either approach is an installation of Xcode; you don’t need an iOS device or have to be a registered Apple developer.
Here are some hints for trying out the app:
Touching the screen in an open area creates a new dot that you can move around to any place you like. Touching near an existing dot allows you to move the dot to a new place.
If you move a dot on top of another dot (or almost on top), they combine into a larger dot.
If you combine three dots near the center of the screen, a large number of randomly placed dots are added to the screen. (The number of dots is doubled.)
If you combine three dots near the edge of the screen, a large number of dots are randomly removed. (The number of dots is divided in half.)
If you shake the device, you get a menu for starting over (with just one dot), or for changing the colors. To shake the phone in the iOS Simulator, use the Hardware -> Shake Gesture menu.
If you combine four dots (which is tricky to do), all four of the dots disappear. This can be useful if you want to clear randomly placed dots from an area.
The app has been built and tested with OS X 10.7 (Lion) and Xcode 4.3.2. If history is any guide, it will work with minor changes for future OS X and Xcode releases as well. A previous version of Voronoi, for earlier versions of OS X and Xcode, can be found in the OCaml Programming Archives.
Voronoi Binary Quick Start
If you have Xcode installed (4.2 or later) and want to run the prebuilt Voronoi binary just for fun, you can download the launcher app and just double-click it. Download the binary for Voronoi Launcher 1.0.2 from Psellos:
Now look in your Downloads folder (where your browser places downloaded
files). You should see a file named voronoi-simapp-1.0.2.zip. Your
browser may have opened it for you automatically. If not, double-click
on it.

The unzipped file is an app named VoronoiLauncher, as shown at the left. Just double-click on VoronoiLauncher to launch the iOS Simulator with Voronoi installed in it. Voronoi will be on the second screenful of apps—swipe to the left to see it. Start Voronoi by clicking on its icon.
If the iOS Simulator doesn’t start up, make sure you’ve installed Xcode
(version 4.2 or later) and the iOS Simulator as described below under
Preliminaries. Another possible reason for failure is if you have
Xcode installed in a non-standard place (not in the /Applications
folder). Drag and drop your Xcode application onto
VoronoiLauncher—this asks VoronoiLauncher to make a note of the
location of your Xcode. Then try starting up VoronoiLauncher again.
If the iOS Simulator starts up but Voronoi doesn’t appear, you may need to change the version number of the simulated iOS. The launcher installs Voronoi inside the iOS 5.1 Simulator. Tell the simulator that it should be simulating iOS 5.1 by selecting 5.1 from its Hardware -> Version menu.
Internally, VoronoiLauncher runs a script that installs Voronoi in the
simulator’s filesystem and then starts up the simulator. I wrote about
this script, named runsim, in a recent blog post Run iOS Simulator
from the Command Line (Improved).
All the required files are inside VoronoiLauncher in a folder named
Resources. If you want to try runsim yourself, here are the
commands to run it:
$ cd VoronoiLauncher.app/Contents/Resources
$ runsim Voronoi
If your Xcode is installed in a non-standard place, edit the file
runsim.xcloc. It should contain the full path of your Xcode app.
(You can also set it by dragging and dropping Xcode.app onto
VoronoiLauncher, as described above.)
Note: for simplicity, the
runsim script uses an unsupported interface. It may need to be
updated for some future version of the simulator.
Voronoi Overview
My first OCaml iOS Simulator app, Gamut, shows how to compile an app using the OCamlXSim compiler that I put together, described in Compile OCaml for iOS Simulator. It also shows how to link and execute the app in the iOS Simulator. However, the Gamut app itself is quite simple. The Voronoi app has more of the feel of a real iOS app.
It has an interactive UIKit component.
It uses the touch interface to manipulate visible objects, and responds to the shake gesture.
It does more complex graphics.
It performs some non-trivial computation.
Voronoi shows how to wrap the UIActionSheet class, which is used to
display a menu when you shake the phone. This is interesting both for
the typing and the implementation. At the type level, you want to have
a good handling for the action sheet delegate, the object that responds
to user touches on the displayed menu. The uiActionSheet.mli file
shows one way to define two mutually recursive classes that capture the
typing.
At the implementation level, you need to wrap the delegate object
correctly in an ObjC object to pass the menu touches from the ObjC world
to the OCaml world. This is a special case of the general problem of
handling dynamically constructed callbacks from ObjC to OCaml. The
ASDelegate class in wrap.m shows a simple solution to the problem.
Each dot of a Voronoi diagram is called a site. The region around each site is a polygon called a cell. The code for drawing a cell seems particularly concise when written in OCaml:
val bezierpath : UiBezierPath.t = UiBezierPath.bezierPath ()

let polypath = function
    | [] -> () (* Nothing to draw *)
    | p1 :: rest ->
        begin
        bezierpath#moveToPoint' p1;
        List.iter bezierpath#addLineToPoint' rest;
        bezierpath#closePath;
        end
While the Gamut app doesn’t do much interesting computation, Voronoi does quite a bit: as you move the sites, it continuously calculates the Voronoi cells to keep the picture updated. It also uses a different set of Voronoi cells (generated internally) to give an interesting color to each point of the screen. As a result, the amount of OCaml code compared to Objective C code in Voronoi is quite a bit higher than in Gamut.
The fraction of OCaml code can continue to increase as you write more complex apps. At Psellos we have a mostly fixed amount of Objective C for our iOS apps, and in fact we write our wrappers mainly in OCaml. So the amount of Objective C is relatively small and independent of the size of the project.
Building Voronoi from Source
You can download the sources for Voronoi and build it yourself. (Then you can modify it to make even cooler pictures.)
Preliminaries
Before starting, you need an installation of Apple’s Xcode development tools, which contain the iOS Simulator as one part. As I write this, the current version is Xcode 4.3.2.
You can download Xcode (for free) from the Mac App Store. See Apple’s Xcode page for more details. After installing Xcode, you need to go to the Downloads -> Components page of its Preferences and also download the “Command Line Tools” and the “iOS 5.0 Simulator.”
You also need an OCaml compiler that conforms to the iOS Simulator ABI. You can use the one I put together—binaries and instructions for building from source are given in Compile OCaml for iOS Simulator.
Download the sources for Voronoi 1.0.2 from Psellos:
Now look in your Downloads folder (where your browser places downloaded
files). You should see a file named voronoi-sim-1.0.2.zip. Your
browser may have opened it for you automatically. If not, double-click
on it. This extracts the project folder, named voronoi-sim-1.0.2.
You may want to move it out of the Downloads folder to a more convenient
place.
Build and Run from Xcode
The project folder contains an Xcode project description that you can
use to build and run Voronoi. Double-click on VoronoiSim.xcodeproj to
start up Xcode. You can also open it from Xcode’s File -> Open
menu.
Make sure Xcode is building the Voronoi target (not Voronoibin) and is building for the iOS Simulator (not a device).
- Click at the left side of the Scheme selector at the left end of the toolbar. A menu drops down. Select Voronoi -> iPhone 5.1 Simulator.
The file Makefile.iossim contains the instructions for building
Voronoi. You may need to change some of the specific settings in this
file. Make sure you are in the Project Navigator, which shows the files
of your project. If necessary, click the triangle next to Voronoi
to reveal them. Click Makefile.iossim in the left pane. The contents
of the file appear in the middle pane. You’ll see lines like this at
the top of the file:
PLAT = /Applications/Xcode.app/Contents/Developer/Platforms/iPhoneSimulator.platform
SDK = /Developer/SDKs/iPhoneSimulator5.1.sdk
OCAMLDIR = /usr/local/ocamlxsim
Change PLAT to the location of your iPhoneSimulator platform
directory, part of the Xcode iOS SDK. Change SDK to the iOS SDK you
wish to use. Probably you want to set it to the most recent SDK that
you have installed. Change OCAMLDIR to the location of your OCaml
compiler for the iOS Simulator.
You can now build and run the app:
- To build and run, click on the Product -> Run menu item.
If things go right, you’ll see the Voronoi app running in the simulator.
You may see the following warning in the Xcode debugger console:
2012-05-28 11:51:57.880 Voronoi[87619:f803] Application windows are expected to have a root view controller at the end of application launch
This warning can be ignored. Voronoi is currently targeted for iOS 3.1
and later, while the rootViewController property of windows wasn’t
added until iOS 4.0. Since the last iOS 3.X devices are fast
disappearing, I’ll target the next version of Voronoi for iOS 4.0 and
the warning will go away.
Build and Run from Command Line
To build and run from the command line, unpack the project folder and
edit Makefile.iossim as above. Use Terminal (or equivalent) to cd
into the folder. Then use make and runsim.
$ make -f Makefile.iossim
...
ibtool --compile Voronoi.nib Voronoi.xib
$ runsim Voronoi
The iOS Simulator should start up, and Voronoi will be on the second screenful of apps, as described above.
Theory of Operation
Voronoi essentially follows the MVC paradigm. The model is a list of points representing the Voronoi sites, and a value called a “color field” that associates a color with each point of the display. The view is the graphical representation of the Voronoi diagram: the colored polygons and dots. These are coordinated by the controller, an instance of the class Voronoictlr.t.
As in the Gamut app, graphics are handled through an Objective C class
named ViewDelegator. It’s a subclass of the Cocoa Touch UIView
class, and its instances delegate their GUI methods to a specified
delegate object. In particular, instances delegate touch events, motion
events, and the drawing method drawRect:. The Voronoictlr class
participates in this ViewDelegate protocol, and thus the controller
receives notifications of touch, motion, and drawing events. The
controller also participates in the UIApplicationDelegate protocol to
receive notifications of changes in the application state.
When you touch the screen, Cocoa Touch calls a method in the
Voronoictlr (inverse) wrapper class, which is translated directly into
an OCaml method call to the controller. The controller determines
whether the touch is near an existing site or is in an open area. In
the first case, the existing site is moved to the beginning of the site
list. In the second case, a new site is created at the touch point and
added at the beginning of the list. Thus, the site to be moved is
always first in the list.
While the touch is active, the controller moves the first site to follow
it. After each incremental move, the voronoi cells are recalculated and
redisplayed. Calculations of the Voronoi cells are handled by the
Vorocells module, and colors for the cells are chosen using the
Colorfield module. The Vorocells module uses a straightforward
(quadratic) algorithm to calculate the cells. The Colorfield module
goes to a fair amount of work to choose colors that look good together.
When you shake the phone and ask to change the colors or the sites, the controller updates the appropriate part of the model accordingly. The controller then recalculates and displays the view.
The startup of an iOS app is usually controlled by a startup file
generated by Interface Builder. For Voronoi, the file is Voronoi.nib.
This file says to create three objects: the main window; an instance of
ViewDelegator that covers the whole screen; and an instance of
Voronoictlr.t. The action sheet (an instance of
UiApplicationSheet.t) is created dynamically when the app is launched,
and so does not appear in the nib file.
Interface Builder
You can browse the structure of Voronoi.nib in Xcode. The source for
this file is named Voronoi.xib. To browse it, open Xcode as above.
Activate the Project Navigator by clicking the Navigate -> Reveal in
Project Navigator menu item. You’ll see Voronoi.xib in the list of
files at the left. Click on Voronoi.xib to select it.
Interface Builder will display the file in the center and to the right.
There is a list of user interface objects, and a schematic drawing in
the middle that shows what they will look like. You can see that
Voronoi.xib is pretty simple. There are only three interesting
objects: the main window, a ViewDelegator instance that occupies the
whole window, and an instance of Voronoictlr.t.
Interactions among objects are controlled by connections. There is a
connection to the controller from the delegate outlet of the
application (represented by File’s Owner). This supports the
application startup notification.
There is a connection from the delegate outlet of the ViewDelegator
to the controller, and a connection from the delegator outlet of the
controller back to the ViewDelegator. These support the notifications
for touches, motion, and drawing.
Since Interface Builder doesn’t know anything about OCaml (at least not
yet), it gets its information from the header files for your wrapper
classes. Note that you need wrappers only for OCaml classes that are
accessed from ObjC, which should be just a few of them. In Voronoi, the
header files are ViewDelegator.h and wrap.h.
Discussion
Although I’ve packaged up Voronoi to run in the iOS Simulator, it will naturally also run directly on iOS devices (iPhone, iPod Touch, iPad) with no changes to the code. The only changes required for iPhone and iPod Touch are to the building environment. For iPad, the nib file will also need to change. The code is written to be independent of the screen resolution, so it ought to run nicely as a native iPad app, in fact.
Feel free to send me any cool looking pictures that you create using the Voronoi app. If you modify the app to make even cooler pictures, please let me know about it so I can give you credit.
If you’re interested in learning more about Voronoi diagrams as
mathematical and computational geometric objects, a good place to start
is the Wikipedia article. An interesting project would be to
replace the simple algorithm in the Vorocells module with a more
sophisticated one, such as Fortune’s Algorithm, and see if this
makes the app more responsive when there are many cells.
Compiling OCaml to run directly on iOS is described in Compile OCaml for iOS. I’ve also put together some example apps that are packaged to run on iOS devices. There is a simple app named Portland that tracks the device’s orientation (portrait or landscape), and a slightly more complicated app named Slide24 that plays (and solves) the classic 5x5 sliding tile puzzle. For a full list of OCaml-on-iOS programming resources, see our OCaml Programming page.
I’d be very happy to explain any part of Voronoi in more detail. The only thing stopping me is my natural shyness. If you have questions, comments, or corrections please leave a comment below or email me at jeffsco@psellos.com.