
Portland: Which Way Is Up on iOS?
Posted by Jeffrey
Quite a few years ago I put together an example that shows how to build a full iOS (iPhone, iPad) app in OCaml. Just now I revamped it to work with the OCaml 4.02.3 compiler and tested it under iOS 9.2. If you’re registered as an Apple developer, you can compile the app and run it on your iPhone. (If you’re not, you can still run OCaml in the iOS Simulator. See Gamut: Explore Colors in iOS Simulator for a simple example app packaged for the iOS Simulator.)
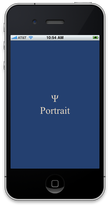
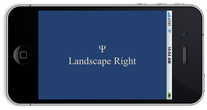
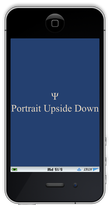
As shown in these screenshots, what the app does is tell you how you are holding your phone: Portrait or Landscape orientation. So I call it Portland.
The most recent version of Portland is 3.0.2. I built and tested it under OS X 10.11.2 using Xcode 7.2, then ran it under iOS 9.2 on a few different devices. I would expect it to work with future Xcode and iOS releases also. Previous versions of Portland, for earlier versions of OS X and Xcode, can be found in the OCaml Programming Archives.
Overview
The main problems of writing iOS apps in OCaml are:
Cross-compiling OCaml to ARM with iOS ABI
Linking to native iOS libraries
Using Interface Builder
Packaging, including code signing
For the first problem, you can use OCamliOS, the OCaml cross compiler for iOS that may one day be part of the official OCaml release. The Portland example shows how to solve the other three problems.
To summarize, you have OCaml wrappers for calling out to the Objective C functions and classes of the native iOS libraries (Cocoa Touch). You also have (inverse) Objective C wrappers for OCaml classes, which allow incoming events from the Objective C world to be transferred into the OCaml world. The inverse wrappers also provide Interface Builder with the information it needs to lay out the GUI and create an initial application state. Finally, code signing and packaging are handled by Xcode.
Keep in mind that the Portland app doesn’t really do all that much, so the amount of OCaml code is only about half the amount of Objective C wrapper code. In a more realistic sized iOS application (like our Cassino and Master Schnapsen/66 apps), almost all the code is in OCaml. The amount of Objective C wrapper code is relatively small and fixed.
Preliminaries
Before starting, make sure you have installed Apple’s Xcode and iOS SDK. You also need an OCaml-to-iOS cross compiler. As I mentioned, I use OCamliOS, a modified version of OCaml 4.02.3. You can download a binary, or build it from source yourself. See Compile OCaml for iOS for details.
Get Portland Sources
Download the sources for Portland 3.0.2 from this link:
Unpack and Check Particulars
$ tar -xzf portland-3.0.2.tgz
$ cd portland-3.0.2
$ ls
Portland Portland.xcodeproj
Most of the work of building Portland is done by Portland/Makefile.
You may need to change some of the specific settings near the beginning:
IOSMINREV = 7.0
HIDEOUT = /Applications/Xcode.app/Contents/Developer
TOOLDIR = $(HIDEOUT)/Toolchains/XcodeDefault.xctoolchain/usr/bin
PLT = $(HIDEOUT)/Platforms/iPhoneOS.platform
SDK = /Developer/SDKs/iPhoneOS.sdk
OCAMLDIR = /usr/local/ocamlios64
IOSMINREV is the minimum version of iOS that you want to run on.
Portland uses no recently introduced features of iOS, so even iOS 7.0 is
new enough. If your Xcode is installed in a nonstandard location, change
HIDEOUT to the Developer directory inside your Xcode application.
OCAMLDIR is the location of your OCaml cross compiler.
Open Xcode and Change Project Parameters
To open Xcode, you can use the following command:
$ open Portland.xcodeproj
This starts Xcode and opens Portland as an Xcode project. You can also open the project file from Xcode’s File -> Open menu.
Make sure Xcode is building for an iOS device (not a simulator) and is building the Portland target (not Portlandbin).
- Click at the left side of the scheme selector at the left end of the toolbar. A menu drops down. Select Portland -> iOS Device.
Note that the device must support the architecture (32-bit or 64-bit) of the cross compiler you’re using. 32-bit iOS devices are becoming more and more rare, so I’ve set things up to specify the 64-bit compiler by default.
Next make sure code signing is configured properly. This is hard to describe, but not so hard to do.
Under the Navigate menu, select Reveal in Project Navigator. This should show the project as a whole and its two targets near the top of the second pane.
Click on Portland, the target. It’s the last listed item in the second pane, with a miniature app icon. (You don’t want Portland, the project, which is at the top.)
Click on Build Settings in the third pane. This brings up a zillion settings for the Portland target.
In the build settings, look at the Code Signing section. Make sure the Code Signing Identity and Provisioning Profile are set to something reasonable for your development environment. For me the code signing identity says “iOS Developer” and the provisioning profile says “Automatic”.
Build and Run
You can now build the app. If you have an iOS device attached, you can build and run it.
To build, click on the Product -> Build menu item.
To build and run, click on the Product -> Run menu item.
If things go right, you’ll see an app running on your iOS device that looks like the screenshots above. Try holding the phone in different orientations; the display will change to show the orientation name.
Theory of Operation
Portland is a very simple iOS app; two classes do almost all the work.
PortlandAppDelegate.tdefines the application delegate. This class has a single instance that participates in theUIApplicationDelegateprotocol to receive notifications of state changes. In particular, the application delegate notices when the app is activated and deactivated.
PortlandViewControllerD.talso has a single instance that acts as an OCaml delegate for the app’s single view controller.
At startup, the application delegate establishes a timer that fires
periodically, calling the timerTick' method of the view controller
delegate. At each tick, the view controller delegate determines the
orientation of the device, and updates the display accordingly.
Interface Builder
If you click on Main.storyboard in the leftmost pane, you’ll activate
Interface Builder to show the storyboard for Portland. There are only
four interesting objects: the view controller, the main view, a label
that covers the whole view, and the view controller delegate. There are
two interesting connections: first, the view controller delegate is
connected as the delegate of the view controller. Second, the label is
connected to the label outlet of the view controller delegate, so it
can can update the display periodically.
Since Interface Builder doesn’t know anything about OCaml (at least not
yet), it gets its information from the header files for the wrapper
classes. Note that you need wrappers only for OCaml classes that are
accessed from Objective C, which should be just a few of them. In
Portland, there’s only one header file, wrap.h.
Discussion
This Portland app is stripped to the essentials, to show how to compile, link, and package an OCaml iOS app. For something with more of the feel of a real iOS app, see Slide24: Sliding Tile Puzzle for iOS.
As mentioned above, you can also run OCaml apps in the iOS Simulator. This is particularly easy, as it doesn’t require an iOS device or any code signing. You can download a compiler binary from Psellos, or build your own compiler from sources. See Compile OCaml for iOS Simulator for more information.
Many other resources, including more example apps for both iOS and the iOS Simulator, are listed on our OCaml page.
If you have comments, questions, or corrections, please leave them below or email me at jeffsco@psellos.com.